Photoshop Tips and Tricks **ADD YOURS** (47)
So since we all use this program to make coin. I felt we needed a repository for some simple things that make our life easier.
I am a total PS noob...I use it all the time for stuff but I prob only use 10% of what it can do....
BUT
I have found a few tricks that I use day to do day that both save time and save my ass.
Tip #1
Want to bring the color you see on that page into PS? Well I usta use color picker or whatever to grab colors from webpages and the like.....BUT no more once I found this little tip....
you need to click on the "eyedropper" 
then click on them main work area with a left click....then drag that to any point on your screen...like anywhere and you will see the dropper continue to be activated....rollover the color you want to bring in...then release and bingo....there's the color.....
easy weasy right? ya I thought so too I just wished I had learned that like 4 months ago...lol
tip # 2
and this one can save you a bunch of time when editing stuff as it allows you to kinda "un-do" tons of edits.
Its called taking a snapshot....and what it allows you to do is just that...take a snapshot of your workspace in its current state....that way after lets say you make 50 edits to an image/banner and then you decide they suck....you can just revert back to where you started on that journey.
so take a snapshop you need to open up the "history" palette...
look for this icon  up by your styles. Click on that and you should get a window like this

tthe blue arrow is pointing to the "snapshot" button...click that...then your current work space is saved at that point in time....
then your free to go and make crazy edits to your hearts content...and then if you need to revert back....just click on that snapshot...bam...back to where you started....
its a awesome time saver if you learn how to use it right....
anyways those are just 2 tips I have come to use when using PS and I am a total hack with it....
BUT
I am sure there are a few of you out there who are quite skilled in PS and the goal of this thread was to out a bunch of the tips each of us use day to day that help improve our productivity...
SO SHARE LIKE A MO-FO.....
Levels Adjustment: Command (Cntrl Windows) + L = Levels Adjustment to enhance the overall brightness contrast of an image.
Hue/Saturation Adjustment: Command (Cntrl Windows) + U = Adjust the hue and saturation of an image to give it brighter colors, just drag the Saturation slider or pick a color from the drop down to enhance in the image.
Layer Masks: Essential for keeping an image intact while still erasing the parts of the image you don't want ( Tutorial vid: http://www.youtube.com/watch?v=DA8TgyTruV8 )
Quick method for adding a border: Command ( Cntrl in Windows ) + A then Go to Edit -> Stroke. Select Inside and 2px-3px width. Done. Make sure you select the color you want with the eye dropper tool first
Sharpening and Image The Right Way: Make sure you select the correct layer you want to sharpen. Click Filters -> Sharpen -> Smart Sharpen. Play around with the settings until you get the correct sharpness for the picture
@polarbacon - I see you're gunning for 2k thanks before tijn. (I'm going to thank all of his posts right after I post this. j/k)
TIP - Download and use instagram-style and other actions to make versions of high CTR images.
e.g., http://dbox.tumblr.com/post/54262490...toshop-actions
The above has a number of boarder actions. Copy and modify them to make red, blue, yellow, etc.
The shortcuts I use ALL THE TIME:
ctrl + << zoom in
ctrl - << zoom out
[ << make your brush, eraser, etc, smaller
] << make your brush eraser, etc, bigger
Here are two I've been using a lot recently:
1. I drag and drop everything into PS. Never use file open, just have my folder open and drop it on the top bar
1a. highlight a bunch of images in a folder then drag and drop all of them into ps to open them all
2. creating custom actions then batch processing with the actions. useful for changing a bunch of gif banners (3 times flashing to forever, etc), batch resizing banners, exporting all open images, and one of my favorites lately, CLOSING all open images. clicking X and 'do not save changes' over and over is a pain in the ass.
I <3 photoshop.
1. To make your files smaller, make sure you select/use "only web colors". http://cl.ly/271M0b1a0B0Y3D072t3V
2. When saving use "save for web & devices" then click "4-Up" on the top panel. It will show you 4 variations of your file in different qualities. So you can see how small you can get your file size, while keep an eye on your image quality. http://cl.ly/1S030Q1h3T0X2A2d1M09
3. If you want to learn photoshop quickly. Go through one of these tutorials every night for a week. You will be a champ. http://www.worth1000.com/
1.create a new layers level
2.change from rgb to red. if on any side of the spectrum there is blank space slide the slide to where the information starts.
3.change from red to green. slide sliders to tighten up if there is any blank space, same as above
4.change from green to blue. repeat with tightening up colors.
your picture should now be way cleaner and sharper, click on the eye picture in layers to remove levels and see before and turn it on to see after. usually very noticable.
5.then resize image to your desired size.
6.go to windows dropdown, choose actions to bring up actions box
7.click the little turned up square inside a square to create a new action, name it whatever you want. you will now be in action recording mode
8.make a new layer for your border
9.select all to select whole image
10.go to select dropdown choose modify. add border. Choose whatever pixel size you want your border to be. hit enter
11.go to color selector choose whatever color you want.
12.go to paint bucket fill tool, fill in the border with whatever color you want.
13.hit stop on the action. now whenever you want to quickly add a border you just go to that action and hit play.
the following can also done before you stop your action if you do it lightly, if you want more fine control for each image do it separately.
14.create a saturation layer and add saturation until flesh tones get a little nicer
15.create a brightness/contrast layer and I often make it a tiny bit brighter and add or subtract a little contrast, depends on the image.
16.sharpen it once or twice.
if you hold down the paint brush tool it will pop up more choices, choose color replacement tool when on your pictures layer. this will let you change colors in the image. boring color shirt on a hot blonde? make that shit a popping color to attract the eyeballs. (takes a bit of practice)
I'm sure i'll remember more randoms and pop back in with them. oh yeah, if you convert to black and white don't just take what it gives you. you can adjust each color band to make certain colors stand out more as blacks/greys and get rid of annoying background dark stuff being in the eyes focus by deadening that color and making it more grey/white. also, look at the dropdown box and try some of those. the infrared can make some pics look great and each color may need a color filter for the bnw processing which it allows you to choose.
If you're looking to do a cartoon type effect on an image, you can use
1) Filter->Gaussian blur (set it to around 5)
2) Go to Edit->Fade Gaussian Blur
3) Play around with the blend settings, I usually use Darken or Darken Colour
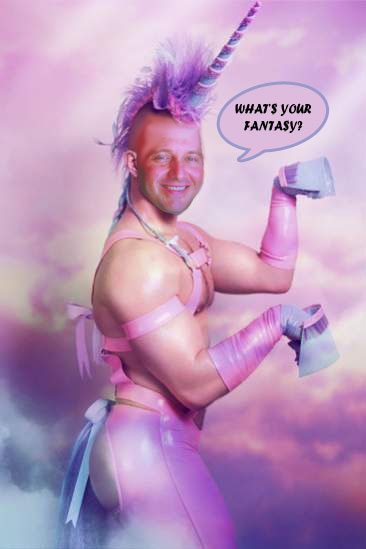
Here's one I prepared earlier..

And if anyone wants to know how put polarbacon's face on a manicorn, make use of the quick selection tool, the blur tool, eraser, smudge tool and play with the colors to get the right tone by selecting the correct layer (in this case, polarbacon's head), and going to Image->Adjustments->Hue/Saturation and having a bit of a play..
Here's one I prepared earlier:
Having graduated from Full Sail here in Winter Park, FL along with Jeremiah Cooper (not same year), I have a bit of an advantage with Photoshop, Illustrator, Dreamweaver, Flash etc. Not that I use the Adobe software as much as I would like to these days. However, when I need the job to get done I can easily jump in there and do it myself. This is what is important!
Who doesn't need to constantly create banners, website creatives, email creatives etc. Wouldn't it be nice to do if for yourself?
My best tip is to watch and learn and play. This really helps if you have duel or even triple monitors. One screen streaming video, one monitor for PS, one monitor for your stats etc.
Check out these free podcast on itunes and you can be an expert in less than 90 days for only the cost of your time and frustration...vs an expensive education.
http://itunes.apple.com/us/podcast/p...-tv/id83927625
Enjoy~!
I know a few tricks

If anyone knows how to make cinegraphs in photoshop, just holla. I've tried a lot of tutorials but they still come out a bit jolty.
I use this to make my images POP!
http://www.topazlabs.com/adjust/
It's a photoshop plugin. Super easy to use.
You know where to get a free copy. 

Invert always does well.

The Topaz filter I use the most is DeNoise. It gives portrait images a softer "glamour" look.
http://www.topazlabs.com/denoise/
Just downloaded 4 of those topaz plugins. Will report back how they go.
Very very clunky. Not impressed with topaz. Maybe I'm just using it wrong haha.
I would recommend something like this for photo effects (its free too) http://dbox.tumblr.com/post/54262490...toshop-actions
I just did this with one of my photos.

Any recommendations on the best photshop tutorials for the stuff we do (free 0r paid). There is tons of tutorials online but I don't need super advanced graphic design tutorials just the best way to make and tweak landing pages & banners. I actually only have photoshop elements so hopefully that is enough to do everything I need.
Cheers
Mike

topaz detail
I just did this out of curiosity on photoshop. You can really get some pop using the blur tool, reduce noise, levels and saturation.

Not quite photoshop, but very useful nontheless:
Extract All Colors’ HEX & ARGB Values From An Image
http://www.addictivetips.com/windows...from-an-image/
a new one per mrgodlike
http://www.youtube.com/watch?v=Avf6Y-4wK28
how to make coupon borders in PS
the 9 shortcuts (on Windows) i use all the time
CTRL+N create new file
CTRL+ALT+C crop image
CTRL+ALT+I image resize
CTRL+ALT+SHIFT+S save for web
CTRL+W close image file
CTRL+Z undo
CTRL+ALT+Z repeat undo
CTRL+A select all
CTRL+D select none
TIPS
- to draw / select a perfect circle or a square hold shift while selecting / drawing
- (the disk space is no more a problem in 2011 but) adding a white (or other solid color) layer over your project will reduce the PSD file size when you save it. For example a 50MB PSD file could become 45MB or less.
"the disk space is no more a problem in 2011 but) adding a white (or other solid color) layer over your project will reduce the PSD file size when you save it. For example a 50MB PSD file could become 45MB or less."
Win.
I've seen that case study on STM comparing some CTR tricks, and the winner was the "false border" one... How can I do that? GIMP tutorial welcome 
http://www.flickr.com/photos/71289143@N06/6690672625/
For those who don't know, this handy tip. When I download an image from GG, I always use Pen tool to cut out the part of the image I want.
Say using the image I attached:
1. Use the Pen Tool (P) on the left side tool bar to cut the parts I don't want out. Its best to do this in stages.
Simply click the pen tool on the area of the image you want to cut out and click along the outline of the body. Make sure the first click point and the last are connected.
2. Go to main tool bar (Top of page) click on window and find "paths", select the 3rd button (icon ) from the left (Load path as selection).
3. Click delete. And your done!
Sorry if I have'nt explained so ell for newbies. If your unsure search it in You Tube there are many tutorials there - that where I learnt it .
1) Select the white background and copy it (short cut = CTRL + J)
2) Select the rectangular marquee tool (short cut = M)
3) Marquee where you want the border on the image
4) Right Click and select Make Work Path.
5) View your paths (on mine the PATHS tab is located next to the LAYERS tab)
6) Right click on the Work Path you just created and Make Selection.
7) Click back to the LAYERS tab and select the Background copy.
8) at the bottom of the LAYERS tab there is a small button (fx) if you hover over it it says add layer style. click that.
9) Stroke the path and the box will show up and allow you to choose the size, color, and if you want it inside or outside the selection.. default is black, 1px, outside.. i usually choose a color, 2-3px, and Inside.
10) Once you click ok, Deselect (short cut = CTRL + D)
11) magic wand (short cut = W) the white area inside the stroke.
12) Use the Eraser tool (short cut = E) and erase all of the white area.
13) Make sure the Layer is selected and above the picture you choose from the start.
14) zoom in (short cut = alt + mouse wheel up) erase all the places you don't want the line to pass through.
Thats the way I do it.. I'm sure there are a couple ways but that one is pretty quick once you learn the short cuts.
Layer Styles! -
Always wanted nice glossy text both don't have the time to play with all the effects?

Layer Styles is your solution
I have attached a few, but you can google yourself to some excitement
http://royks.deviantart.com/art/15-5...et-1-164206352
http://royks.deviantart.com/art/16-4...et-2-164206492
Hey guys,
I did a tutorial on Photoshop batch processing. It walks you through an example on turning your 110x80s into 310x110s. It's a simple example, but it shows the mechanics and possibilities of the amazing function in Photoshop. Sky is the limit with what you can do in batch.
I hope you guys find it useful. Enjoy!!
http://www.ipyxel.com/photoshop-auto...utomate-batch/
My favorite trick has nothing to do with Photoshop, it's actually using Lightroom. I wouldn't miss it for image management and basic editing. For heavier retouching there's no alternative to dropping down into PS, but for anything else I find it way easier.
This took me ~2 minutes of just dragging a bunch of sliders around:

I think I saw something similar to this in another thread... but this is a really simple simple way to resize multiple pics at once.
The cool part about this method is it Scales images without messing up the dimensional symmetry (so your pics won't look out of wack). So if the picture is square, 500 x 500, and you want it resized for FB, 100 x 72is (props to Finch for pointing that out!) it won't mess it up and skew it out of focus (see step 4).
Found it at this website... http://www.digital-photography-schoo...e-in-photoshop
I use it for FB pics mainly, but can be for whatever.
Steps:
1) File ->Scripts ->Image Processor
2) Select your folder of images you want resized
3) Choose the folder you want to save the resized images in
4) Set the max parameters that the resized height and width CAN'T exceed, check "Resize to fit"
5) Select quality of image 0-12, 0 = lowest, 12 = highest
6) Check "Save as JPEG"
7) Click Run
And boom... I just scraped 100+ images today and they were all resized in under 30 seconds... thank god there are smart people who create shit like this!!
@dubbsy
Check out xnconvert bro.
http://www.xnconvert.com/
Does all this and a lot more in regards to batch processing. Can do borders too. Epic program, and it's free.
Guys,
Did another video on getting from an image you found into the exact size you want with some touch up in under 30 seconds. We deal with a lot of image editing before ad upload and thought this could help some guys speed things up. Hope it's useful!
http://www.ipyxel.com/ad-making-touc...an-30-seconds/
-Tom
pretty Cool Tom, liked that a lot.... only need to work out the short cuts now
Just threw up another video on 3 tips to differentiate your ads. In a sea of ads, you want to do little things to better differentiate your ads so they get noticed.
Check it out, hope ya like!
http://www.ipyxel.com/3-tricks-to-di...of-ad-example/
-Tom
holy kaw that border thing is awesome, i've been using picnik for this but they're closing shop and I was getting nervous, thx a bunch !
Photoshop CS6 is finally getting dashed border styles.
Probably a little late, but here are some Photoshop valentines themed brushes:
http://www.photoshopsupport.com/phot...e-brushes.html
was about damn time.
In this latest tutorial, I go over how to create your own image variations and save them to test it on batches ads using Photoshop.
I also walk you through how to replicate 110x80 ads in POF and turn them into 310x110s so that you can make any tweaks you want on top of the successful 110x80 ads that you may already have.
This should be a useful Photoshop tutorial in the usefulness of Photoshop batch processing/record actions for any type of ads/traffic sources, as well as a good intro for those who struggled with 310x110 banner ads but have found some success in the 110x80 ads of POF.
http://ipyxel.com/create-your-own-im...of-110x80-ads/
Enjoy!
-Tom
Am I missing something?
HD, you click and hold left mouse button starting in your PS work area somewhere such that the eye dropper cursor is active. Then if still holding down left mouse you can capture colour on any part of the screen provided PS does not lose focus. Thus, this is much easier to use with dual monitors with the webpage on the other screen. Otherwise, move the PS window to the side a bit so you can see your webpage/photo/whatever behind the PS window and do the same. I tend to just hit print screen -> paste into photoshop -> eye dropper it from there. That way I just hit alt+tab -> prt scr -> alt+tab -> ctrl+v -> i (for eyedropper).
@Zeno : thanks I just tried that, fantastic tip !
I was looking for some GIMP & Photoshop tutorials and found an interesting list of ALL the best features of both software.
http://dl.meetthegimp.org/GIMP_vs_PS_r2.pdf
Many of them i didn't even know existed
I just found another great time-saver, by mistake.
Do you know when you move things around the canvas using the arrow keys on your keyboard? Doing it while pressing the shift key speed up movement a lot!
Home > Design - Imagery, Banners & Landers >